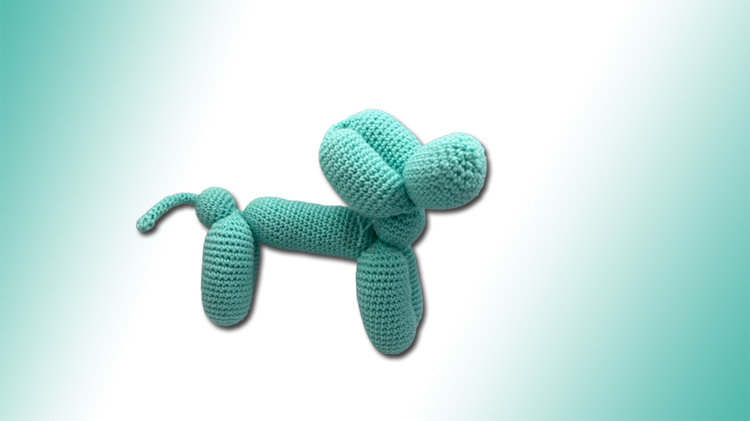
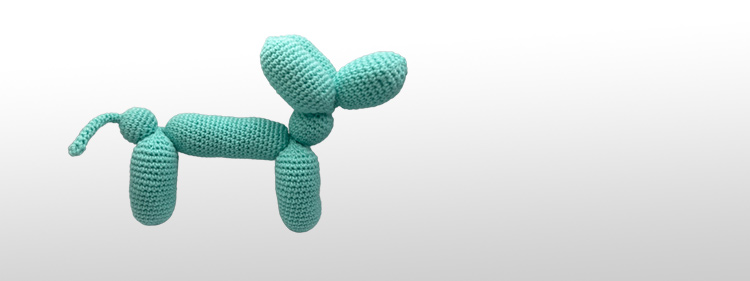
We all came across balloon animals at some stage in our lives but you might not have seen a balloon dog amigurumi pattern, until now. As kids, haven’t we all wished the balloon animals would stay inflated forever even though we knew that would be impossible?
Well this balloon dog amigurumi pattern is the next best thing! This is the easiest and beginner friendly pattern and you will have tons of fun working on this project. Let’s get started on our balloon dog amigurumi pattern!
Items needed to make a balloon dog:
This balloon dog amigurumi pattern is great for all levels but especially for beginners since there are not many different types of stitches used.
Here is a comprehensive list of everything you will need for this pattern:
- We used a US G-6 (4.0mm) crochet hook (or your preference)
- Medium/worsted weight 100% acrylic yarn in light blue (or your preference)
- Poly-Fil stuffing, yarn scraps or miscellaneous stuffing
- Scissors or cutting tool
Stitch terms used in this pattern:
Stitches and abbreviations used in our free balloon dog amigurumi pattern:
Sc = Single crochet
Inc = Increase (2 sc in one stitch)
Dec = Decrease (2 sc together)
* repeat around the round
Let’s start on our balloon dog!
We are starting from the [TAIL]. Take your light blue yarn:
Round 1: Sc 4 into a Magic Ring (4)
Round 2-14: Sc around (4)
Round 15: *Sc, Inc* (6)
Round 16: *Inc* (12)
Round 17: *Sc, Inc* (18)
Round 18: *Sc 2, Inc* (24)
Round 19-22: Sc around (24)
Round 23: *Sc 2, Dec* (18)
Start stuffing
Round 24: *Sc, Dec* (12)
Stuff more, this will be your last opportunity to stuff the tail until it becomes difficult to put stuffing within.
Round 25: *Dec* (6)
Round 26: *Dec* (3)
Now let’s move on to the [BACK LEGS]; this section will need to be done twice to make both legs (meaning once you get to the end of leg 1, start again at the top of this section to complete your leg 2).
Round 1-2: *Sc* (3)
These 2 rounds serve as the connector between each section and you will be doing more of these rounds as we move forward in the project. Since we are working with very small rounds and it can be difficult to do proper single crochets when the rounds are super thin, an advice I can give you is to do front loops only.
Round 3: *Inc* (6)
Round 4: *Inc* (12)
Round 5: *Sc, Inc* (18)
Round 6: *Sc 2, Inc* (24)
Round 7-22: Sc around (24)
Round 23: *Sc 2, Dec* (18)
Start stuffing
Round 24: *Sc, Dec* (12)
Stuff more, this will be your last opportunity to stuff the leg until it becomes difficult to put stuffing within.
Round 25: *Dec* (6)
Round 26: *Dec* (3)
Once both of the back legs are done, you should now have 3 segments (tail, back leg 1 and back leg 2). Now we are moving on to the [BODY] of the balloon dog.
Do You Love a Free Crochet Pattern?
Join the fun! Subscribe now for free patterns.
Round 1-2: *Sc* (3)
Round 3: *Inc* (6)
Round 4: *Inc* (12)
Round 5: *Sc, Inc* (18)
Round 6: *Sc 2, Inc* (24)
Round 7-30: Sc around (24)
You’ll notice we did 24 rows here but feel free to do a little less rows if you want the body of the dog to be shorter in length. You can also add some rows but we would not recommend adding too many rows because otherwise your balloon dog will have a hard time standing on its own.
Round 31: *Sc 2, Dec* (18)
Start stuffing
Round 32: *Sc, Dec* (12)
Stuff more, this will be your last opportunity to stuff the body until it becomes difficult to put stuffing within.
Round 33: *Dec* (6)
Round 34: *Dec* (3)
We’re now at the [FRONT LEGS] segments. Similar to the back legs, you will need to do this section twice to get both legs.
Round 1-2: *Sc* (3)
Round 3: *Inc* (6)
Round 4: *Inc* (12)
Round 5: *Sc, Inc* (18)
Round 6: *Sc 2, Inc* (24)
Round 7-22: Sc around (24)
Round 23: *Sc 2, Dec* (18)
Start stuffing
Round 24: *Sc, Dec* (12)
Stuff more, this will be your last opportunity to stuff the leg until it becomes difficult to put stuffing within.
Round 25: *Dec* (6)
Round 26: *Dec* (3)
Once done with both sections of the front legs, you should now have 6 segments (tail, back leg 1, back leg 2, body, front leg 1 and front leg 2). We’re almost done! We’re now doing the [NECK].
Round 1-2: *Sc* (3)
Round 3: *Inc* (6)
Round 4: *Inc* (12)
Round 5: *Sc, Inc* (18)
Round 6: *Sc 2, Inc* (24)
Round 7-12: Sc around (24)
Round 13: *Sc 2, Dec* (18)
Start stuffing
Round 14: *Sc, Dec* (12)
Stuff more, this will be your last opportunity to stuff the neck until it becomes difficult to put stuffing within.
Round 15: *Dec* (6)
Round 16: *Dec* (3)
Next, we are doing the [EARS] of the balloon dog. Similar to the legs, we need to make this section twice.
Round 1-2: *Sc* (3)
Round 3: *Inc* (6)
Round 4: *Inc* (12)
Round 5: *Sc, Inc* (18)
Round 6: *Sc 2, Inc* (24)
Round 7-19: Sc around (24)
Round 20: *Sc 2, Dec* (18)
Start stuffing
Round 21: *Sc, Dec* (12)
Stuff more, this will be your last opportunity to stuff the ear until it becomes difficult to put stuffing within.
Round 22: *Dec* (6)
Round 23: *Dec* (3)
Once you’re done with the two ears, we’re on our last segment: the [MUZZLE]!
Round 1-2: *Sc* (3)
Round 3: *Inc* (6)
Round 4: *Inc* (12)
Round 5: *Sc, Inc* (18)
Round 6: *Sc 2, Inc* (24)
Round 7-15: Sc around (24)
Round 16: *Sc 2, Dec* (18)
Start stuffing
Round 17: *Sc, Dec* (12)
Stuff more, this will be your last opportunity to stuff the muzzle until it becomes difficult to put stuffing within.
Round 18: *Dec* (6)
Round 19: *Dec* (3)
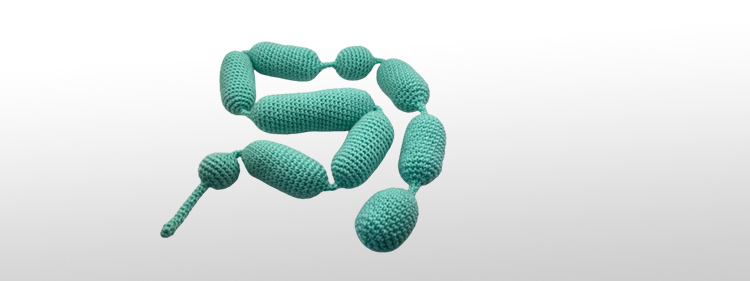
You’re all done! You should now see 10 segments for your crochet balloon all ready to be twisted to take its dog shape, making a really neat balloon dog!
Final thoughts on the balloon dog amigurumi pattern
We hope you enjoyed working on this balloon dog amigurumi pattern as much as we did. You can now play with your balloon dog without the risk of it ever deflating! Let us know if you would like more balloon animal patterns. In the meantime, enjoy our ice cream snail pattern.