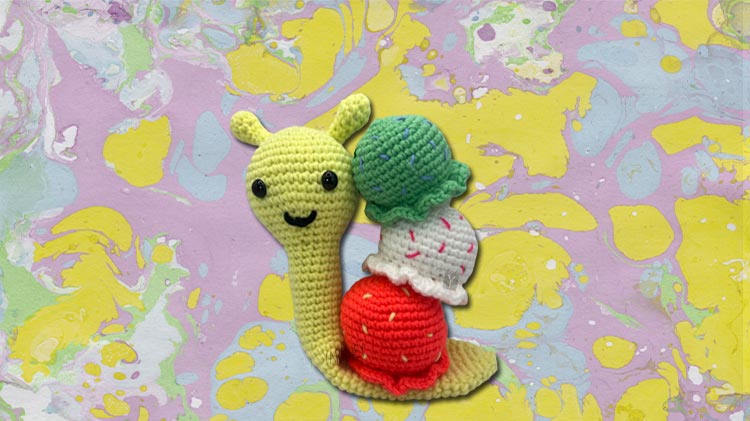
Want to make a quick amigurumi project? Join us making this slow amigurumi snail in this free pattern. This snail is a mix a colors and a lot of fun by using ice cream instead of a shell. It will be sure to make you or a kid smile once you sew it all together. Gather up your yarn and follow along as we crochet an amigurumi snail pattern!
Items Needed for Our Amigurumi Snail:
This amigurumi snail pattern is great for beginner to intermediate crocheters.
Here is a comprehensive list of everything you’ll need for this pattern –
- We used a US E-4 (3.5mm) crochet hook.
- Medium/ worsted weight 100% acrylic yarn in light yellow, white, green and pink/red. Sprinkles in yellow, pink and light blue. Black for sew in smile.
- Yarn needle
- Safety eyes
- Polyfill stuffing, yarn scraps or miscellaneous stuffing
- Scissors or cutting tool
Stitch Terms Used In This Pattern
Stitches and abbreviations for our free amigurumi snail pattern:
Sc = Single Crochet
inc = increase (2 sc in one st)
dec = decrease (2 sc together)
* = repeat around the round
Let’s Start on Our Amigurumi Snail!
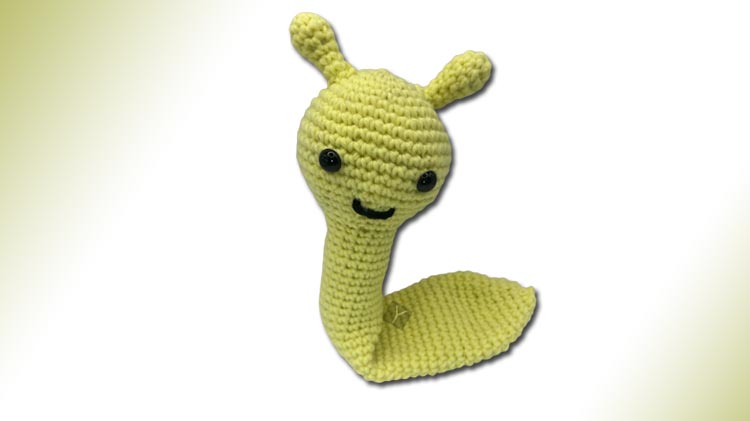
Let’s start with the snail head. Begin with light yellow yarn:
Round 1: Sc 6 into Magic Ring (6)
Round 2: *Inc* around (12)
Round 3: *Sc, Inc* around (18)
Round 4: *Sc 2, Inc* around (24)
Round 5: *Sc 3, Inc* around (30)
Round 6: *Sc 4, Inc* around (36)
Round 7: *Sc 5, Inc* around (42)
Round 8-14: Sc around (42)
Round 15: *Sc 5, Dec* around (36)
Round 16: *Sc 4, Dec* around (30)
Round 17: *Sc 3, Dec* around (24)
Do You Love a Free Crochet Pattern?
Subscribe below for Yarrney patterns and updates!
Insert eyes into row 11, with 9 stitches apart.
Round 18: *Sc 2, Dec* around (18)
Round 19: Sc into FLO around (18)
Begin stuffing with fiberfill up to row 33.
Round 20-33: Sc around (18)
Round 32: *Sc 2, Inc* around (24)
Round 33-52: Sc around (24)
Round 53: *Sc 2, dec* around (18
Round 54: Sc around (18)
Round 55: *Sc, dec* around (12)
Round 56-59: Sc around (12)
Finish off and leave tail to close up the hole. The tail should still be flat.
The Amigurumi Snail Antennas:
Start in light yellow (make 2)
Round 1: Sc 6 into Magic Ring (6)
Round 2: *Sc, Inc* around (9)
Round 3: Sc around (9)
Round 4: *Sc, Dec* around (6)
Round 5-7: Sc around (6)
Finish off and leave tail for sewing onto head. You can go ahead and sew these into the top of head, leaving a space in the middle.
Onto the Scoops for the Snail!
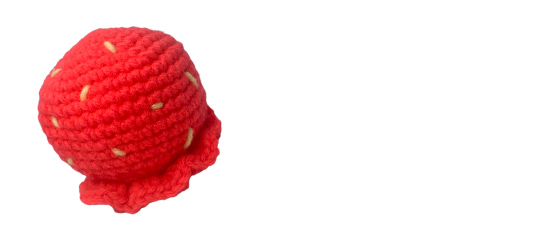
Large Scoop: Start in a pink/red
Round 1: Sc 6 into Magic Ring (6)
Round 2: *Inc* around (12)
Round 3: *Sc, Inc* around (18)
Round 4: *Sc 2, Inc* around (24)
Round 5: *Sc 3, Inc* around (30)
Round 6: *Sc 4, Inc* around (36)
Round 7: *Sc 5, Inc* around (42)
Round 8-14: Sc around (42)
Round 15: *Sc 5, Dec* around (36)
Round 16: *Sc 4, Dec* around (30)
Round 17: *Sc 3, Dec* around (24)
Round 18: In the FLO, 2 Hdc in first stitch, and 4 hdc into next, repeating *2 Hdc, 4 Hdc* around. (This makes the ruffles)
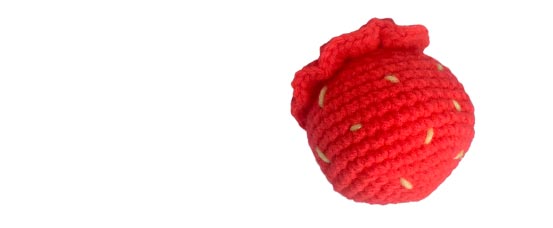
Finish off, stuff with fiberfill and leave a very long tail to sew onto the snail body.
Second Scoop: Vanilla
Grab your white
Round 1: Sc 6 into Magic Ring (6)
Round 2: *Inc* around (12)
Round 3: *Sc, Inc* around (18)
Round 4: *Sc 2, Inc* around (24)
Round 5: *Sc 3, Inc* around (30)
Round 6: *Sc 4, Inc* around (36)
Round 7-12: Sc around (36)
Round 13: *Sc 4, Dec* around (30)
Round 14: *Sc 3, Dec* around (24)
Again, we will be repeating the same steps to create the ruffles.
Round 15: In the FLO, 2 Hdc in first stitch, and 4 hdc into next, repeating *2 Hdc, 4 Hdc* around.

Finish off, stuff with fiberfill and leave a very long tail to sew onto the first scoop.
Mint Crochet Ice Cream Scoop: The Last Scoop
Grab a light green yarn
Round 1: Sc 6 into Magic Ring (6)
Round 2: *Inc* around (12)
Round 3: *Sc, Inc* around (18)
Round 4: *Sc 2, Inc* around (24)
Round 5: *Sc 3, Inc* around (30)
Round 6-10: Sc around (30)
Round 12: *Sc 3, Dec* around (24)
Round 13: *Sc 2, Dec* around (18)
Again, we will be repeating the same steps to create the ruffles for the last scoop.
Round 15: In the FLO, 2 Hdc in first stitch, and 4 hdc into next, repeating *2 Hdc, 4 Hdc* around.

Finish off, stuff with fiberfill and leave a very long tail to sew onto the second scoop.
Sew in Your Sprinkles
To add your sprinkles into your ice cream scoops, grab some contrasting colors and sew in stitches spread out on your ice cream cones.
Assembling Your Amigurumi Snail
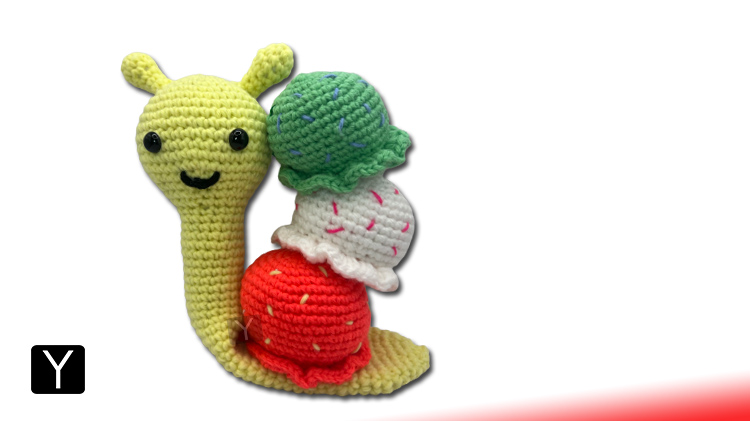
First you are going to sew your pink scoop to the tail of the snail and the body. Make sure it attached to both the body and tail.
Next, the white scoop get’s sewn on to the top of the pink scoop.
Lastly, sew your mint scoop onto the top of the white scoop and the side of the snail head.
Final Thoughts on The Amigurumi Snail Pattern
Congrats! You made it! Hopefully it wasn’t too hard. We hope you enjoyed that amigurumi snail pattern and join us for another great pattern like the colorful peacock.

